 +86 1525 3141 880
The difficulty of this puzzle box will be fairly easy. I probably would rate it a 3-4 on a scale from 0 to 10. If you don’t want to know exactly how to open the box, don’t read the following paragraph or watch the video. But if you read through the instructions and build the box, it will be pretty obvious anyway…
After I sketched out some ideas for the locking mechanism on paper, I used Fusion 360 to create a complete 3D model of the puzzle box. This allowed me to test if all the interactions were working as planned and make adjustments in case they did not.
Each part that will be cut on the laser is modeled as a separate component. Once, I had all the parts modeled and was happy with the design, I copied all components and laid them out flat using a planar joint. Then I used the CAM module in Fusion to create the paths for cutting and exported them.
NOTE: The locking mechanism requires tight tolerances to work smoothly.
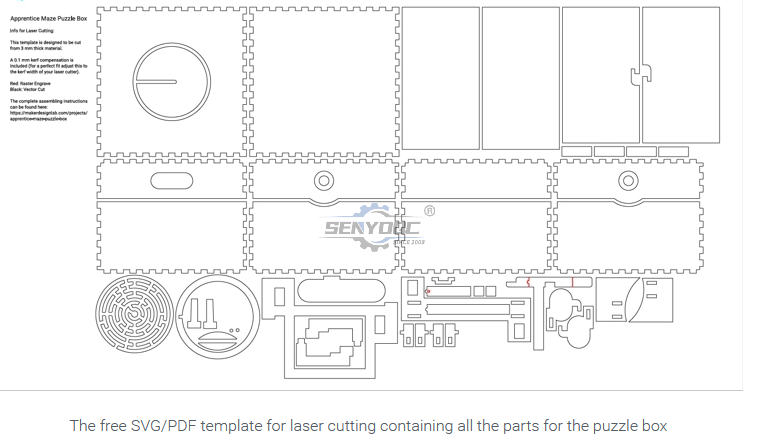
Therefore it is important to consider the kerf width when cutting. By
testing different settings I found that a kerf compensation of 0.1 mm
worked best for me (and this is included in the templates). But this
depends on the type of laser machine and material you are using.
I recommend adjusting to your kerf width before cutting for the best results.
Currently, my favorite workflow
is to sand the top and bottom surface of the wood and add masking tape
before the laser cutting.
Sanding the complete panel in one go is
much quicker than sanding the individual parts afterward. I also find
that the masking tape holds on better to the wood when the surface is
smoother. Just make sure to get rid of all the sanding dust before the
masking.
I cut everything on a Trotec Speedy laser cutter at my local makerspace. On two parts I used engravings to exactly mark the position of other parts which will be glued on top.
I do
not like the look of laser burnt edges on boxes, so I designed all the
finger joints of the box to be 0.3 mm (0.01 in) longer than necessary to
have excess material that can be sanded away.
As I already sanded
the wood surface before laser cutting, there was not much additional
sanding needed there. I just did a final light sanding with 320 grit and
then proceeded with staining and oiling.
On all the parts that will not be stained I applied a coat of linseed oil.
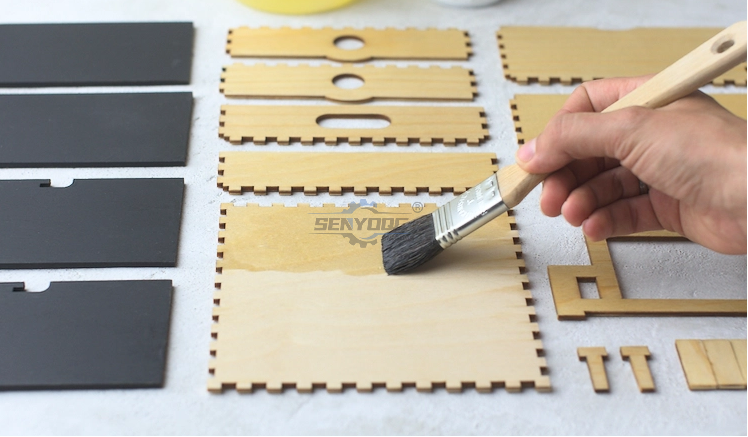
Below you find a short description of
the assembly steps. Please also refer to the pictures in the image
slider to see which parts are needed for each step and where they need
to go.
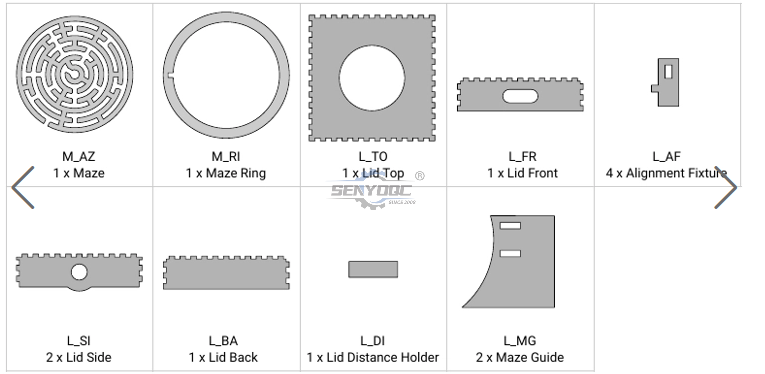
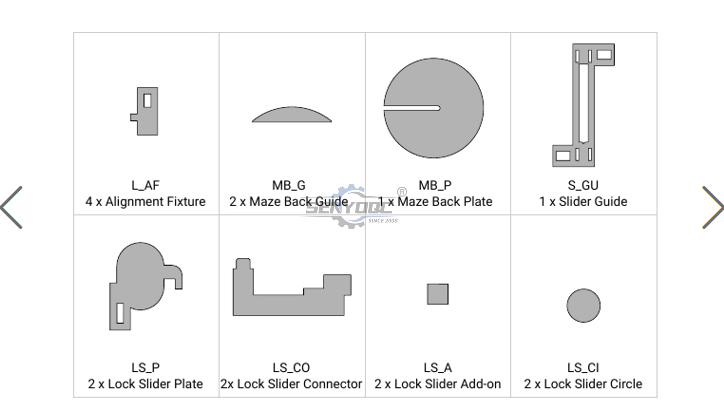
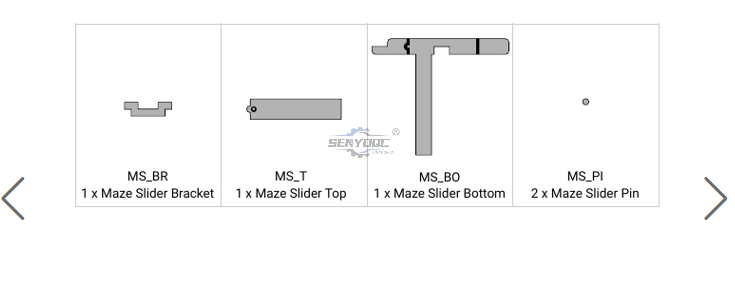
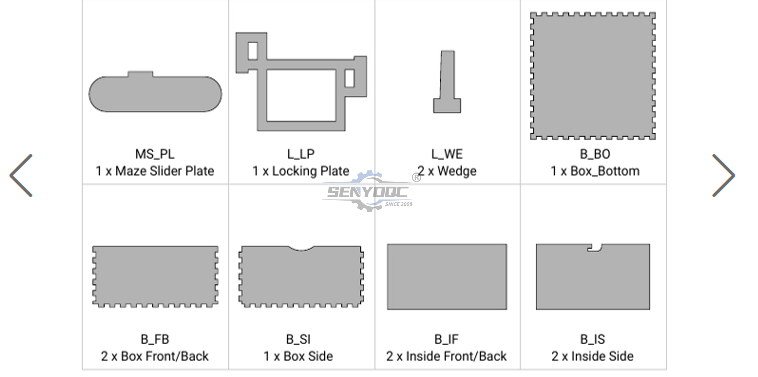
The complete part overview and all the assembly drawings are included as PDF document when you download the cut template above.
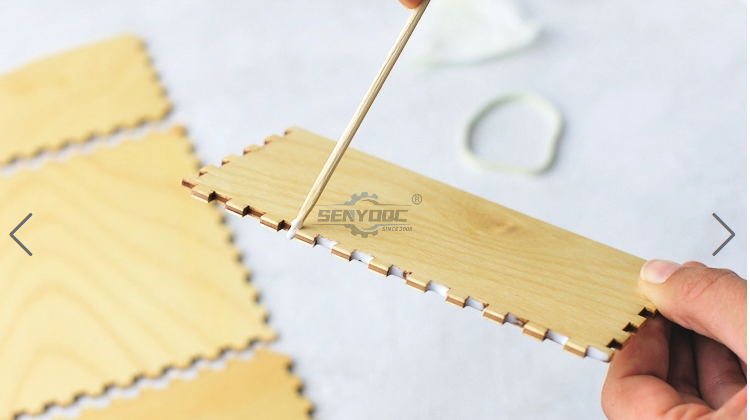
Glue the maze (M_AZ) and the ring with the small cutout (M_RI) together. Make sure that the cutout on the ring and on the maze align.
Glue the four wall parts (L_FR, 2 x L_SI and L_BA) and the top of the lid (L_TO) together.
Glue the four distance holder parts (L_DI) to the side walls with the circular holes.
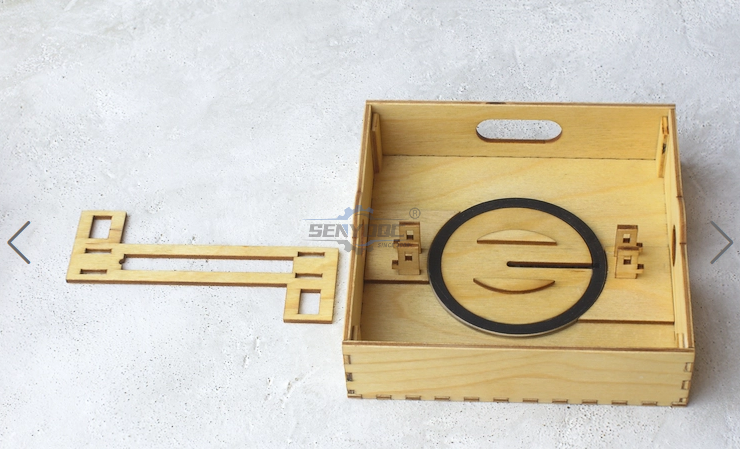
Place maze and check if it rotates freely (sand the hole if it doesn’t). Next combine the parts L_AF and L_MG as shown in the drawing. Glue the parts L_AF and L_MG to the lid using the maze as a guide for placement. Make sure that the maze is still rotating freely.
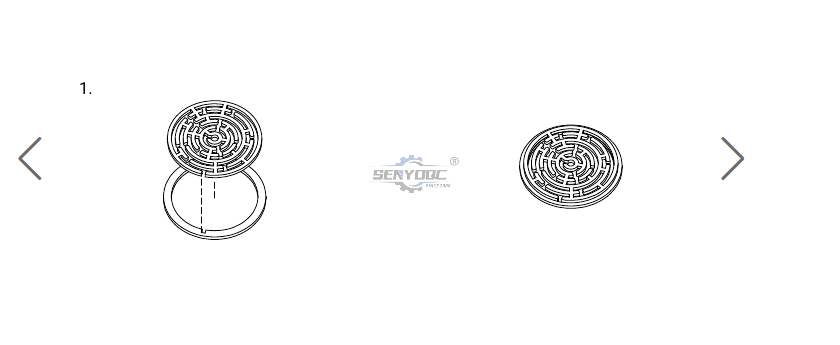
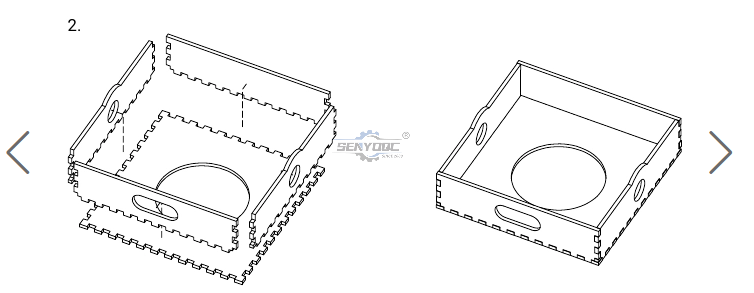
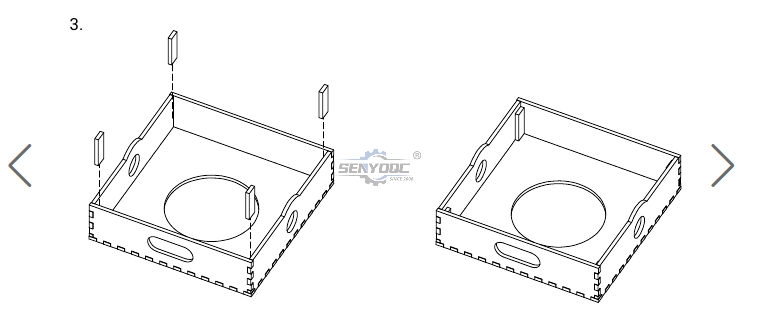
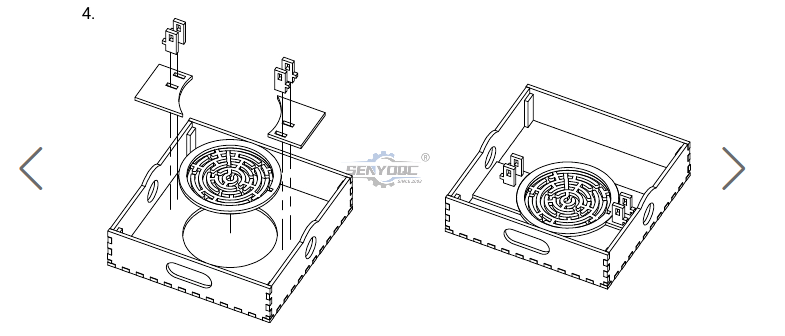
After successfully completing the steps above, your lid should look as pictured below:
After completing the lid, continue with the lock mechanism.
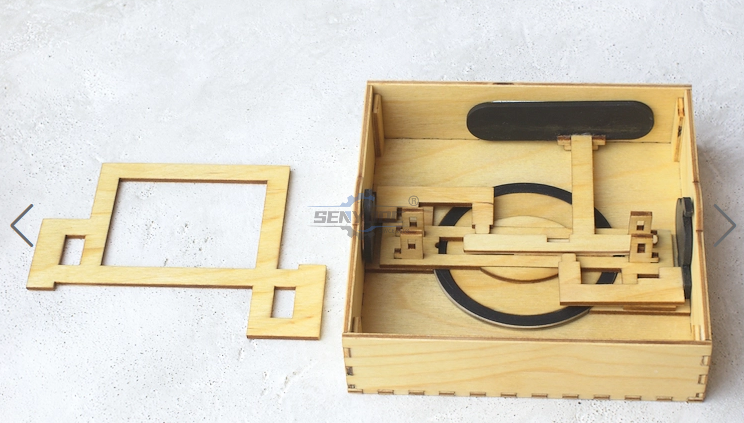
Glue the two MB_G parts onto the maze backplate (MB_P) using the engraving as a guide. Then place them on top of the maze. Next place the slider guide (S_GU).
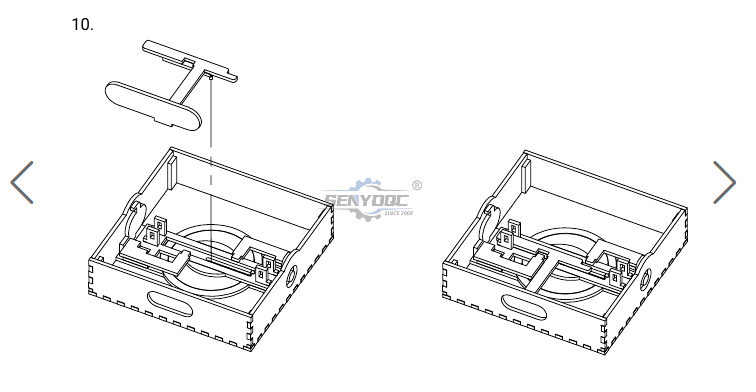
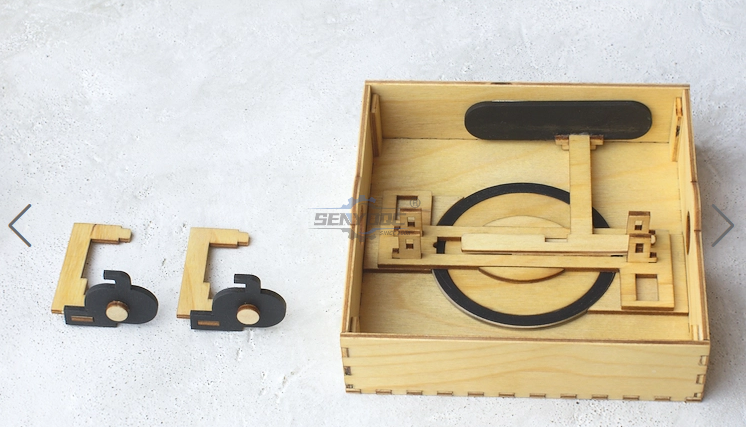
To make the two sliders which are locking the to box, glue parts LS_P, LS_CO and LS_A together as shown in the drawing.
Place the two lock sliders so that part LS_A is in the rectangular cutout of the slider guide (S_GU).
Make sure the lock sliders are moved all the way outward (in the “locked” position”) and then glue the circles (LS_CI) centrally on the slider plates (LS_P)
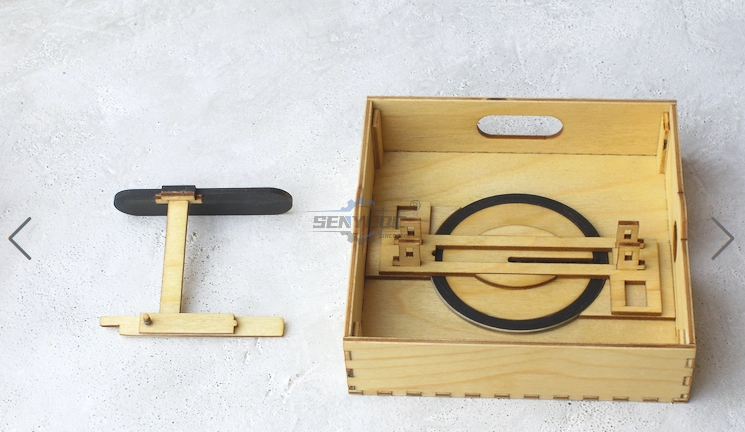
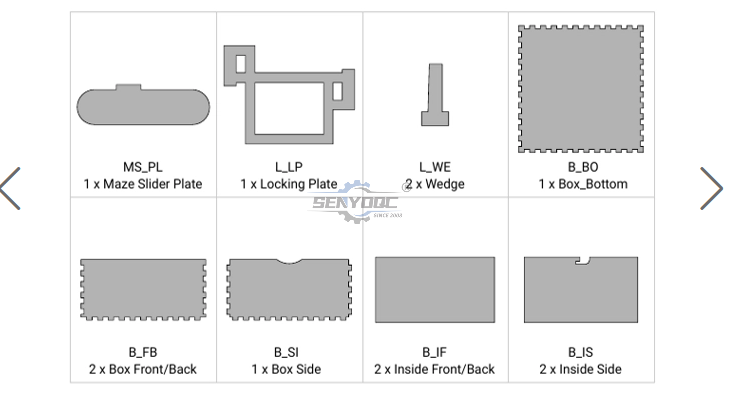
Next, assemble the maze slider. Glue the parts MS_BR, MS_T, MS_BO, and MS_PL together. After the glue has dried for these parts, glue the two small pins (MS_PI) together and then on part MS_T. Use the engravings for placement.
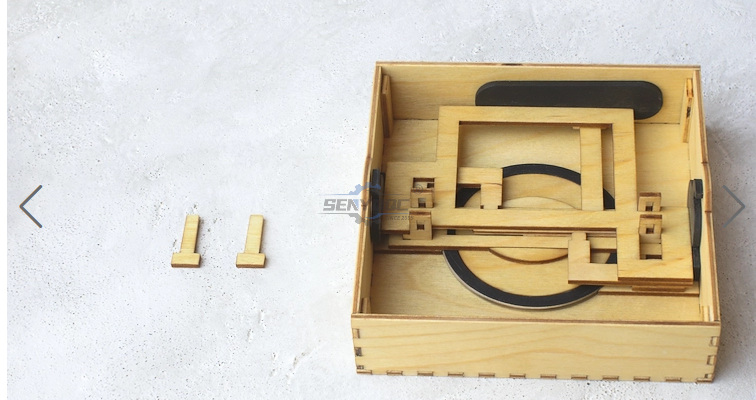
Place the maze slider in the slider guide. The pin should be in the center of the maze.
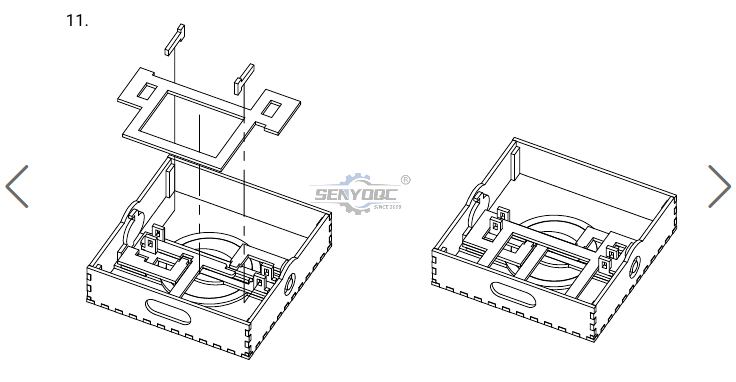
Add the locking plate (L_LP) on top and fasten everything using the two wedges (L_WE)
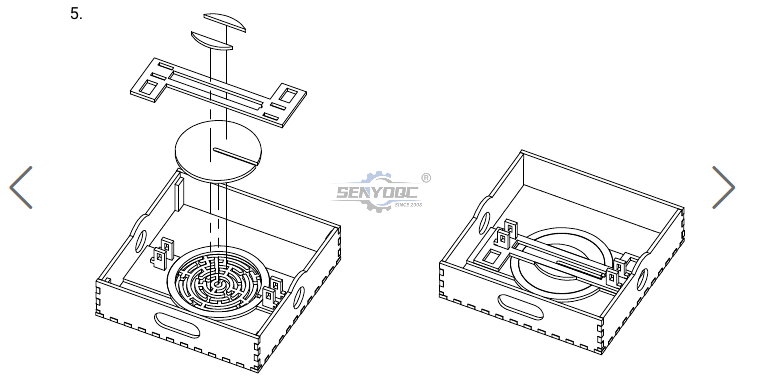

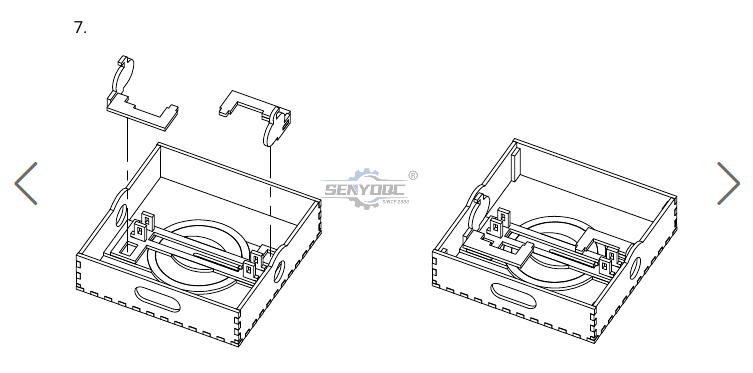
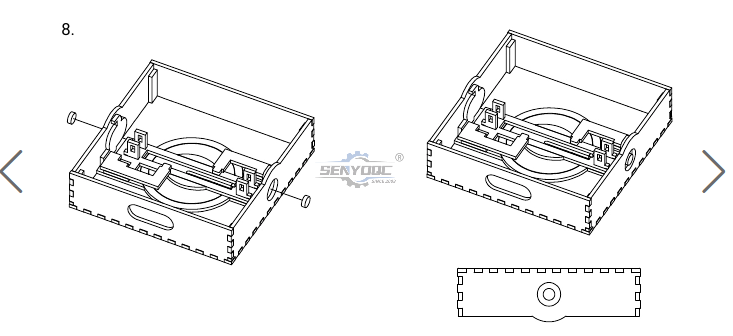
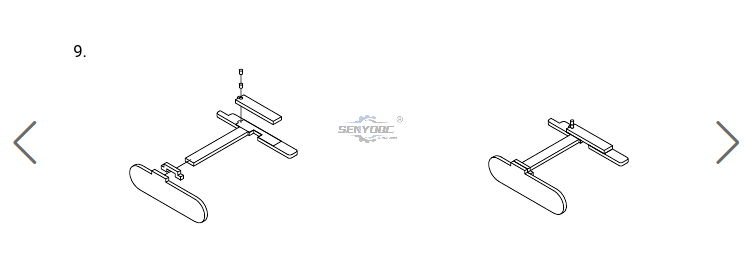
When you have completed the assembly of the mechanism, you should test
if all sliders move easily. All the moving parts of the mechanism are
held in place with the help of wedges. This way it is easy to fine-tune
all moving parts.
Originally the tolerances on the maze slider were a
bit too tight and I had to sand down the edges for smooth movement. I
corrected this in the downloadable template so only small adjustments
should be necessary.
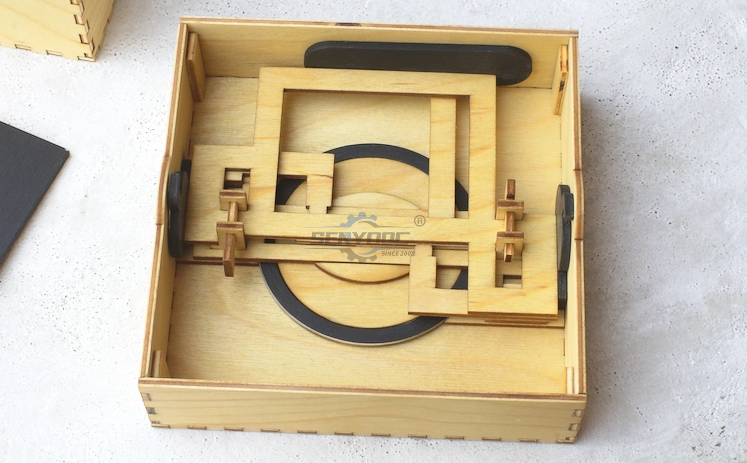
The last steps are to make the bottom box.
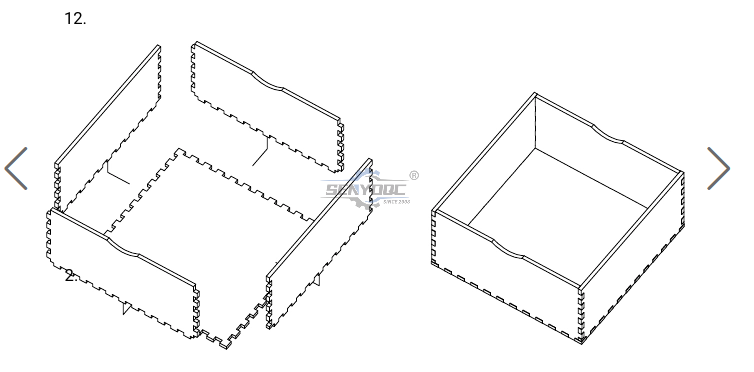
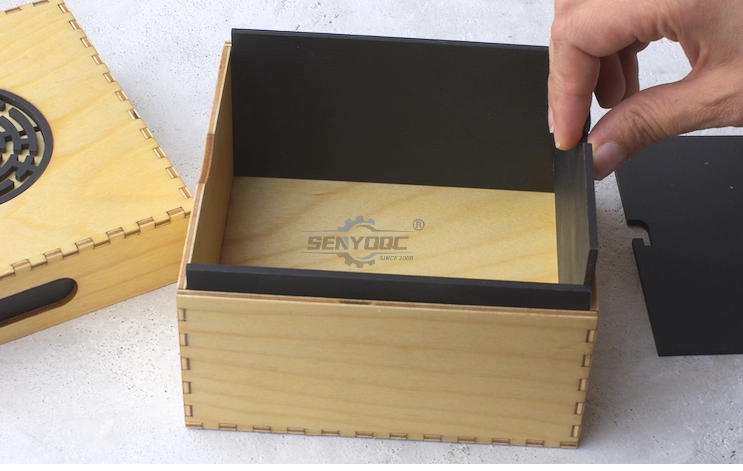
Glue the four wall parts (2 x B_FB and 2 x B_SI) and the bottom of the box (B_BO) together.
As the final step glue the four inside walls (2 x B_IF and 2 x B_IS) in.
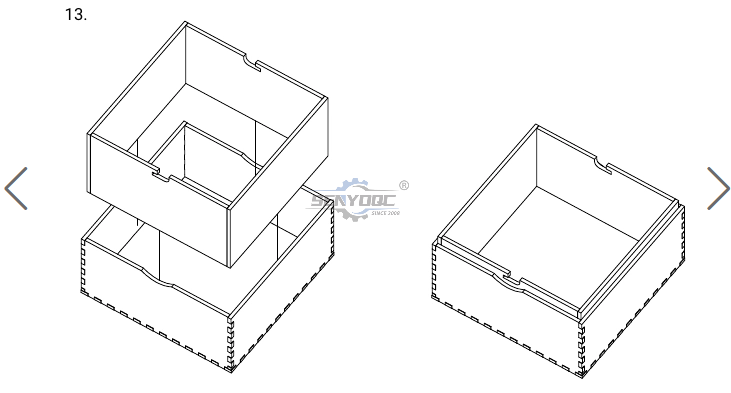
The only thing left to do now is to
close the box. To do this make sure that the maze pin is in the middle
of the maze and the lock sliders are in the “unlocked” position (pushed
outwards).
After putting the lid on you can move the two lock
sliders on the sides to lock the box and then navigate the pin in the
maze all the way outwards.
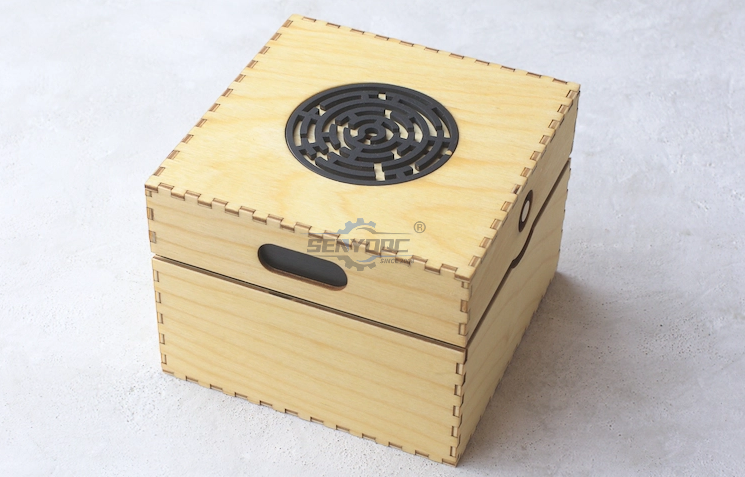
Now the maze puzzle box is ready to be given away to somebody to figure out its secret!
• Previous: Box laser cutting software share
Jacob from United States
I am a beginner at CNC, I’ve never used a CNC machine before and with in a day I was carving. An awesome machine for a beginner to learn as hobbyists. I used the manual and the help video. One hour to assemble and test, very friendly and easy to use. It’s a good buy for the money. I would definitely recommend this machine to someone getting into CNCs.
Weinstein from France
I've been using CNC plasma SYP2060-300A and I am very impressed with this unit.
This unit is of higher quality, made in China. Five stars all the way!
2040 from INDIAN
Best 2040 CNC Router Good Price and Quality ! Thank SENYOQC
10w uv laser from American
Best supplier ! I bought 3 machines for laser and router , thank you Aillen ! --Alec
12KW Fiber Cutting - 2000X6000mm -- 이병헌 from Korea
Good machine for metal cut ! Thanks Senyo , Its prefect , I like your business patient kind!
I am a furniture manufacturer, and this machine is very good and fast. thanks Senyoqc Team ! from Bangladesh
Metal ArtWork from Denmark
The plasma cutting machine makes my artistic creation more convenient and precise!! Created more artistic ideas and value! Thank you Aillen team!
Thanks for 3D CNC Router, so much 3D works, just everyday use machine works.that is what makes the magic happen. from
Thanks for 3D CNC Router, so much 3D works, just everyday use machine works.that is what makes the magic happen.
I'm getting a little bit closer to completing more art deco jewelry use fiber laser marking machine.Thank you Senyo from
I'm getting a little bit closer to completing more art deco jewelry use fiber laser marking machine.Thank you Senyo
Thank you Senyo for SYJ1290-150W! from
Retired, ex mainframe systems programmer. Now full-time recreational woodworker majoring in puzzles, pens, boxes, Toys and occasional small furniture. Thank you Senyo for SYJ1290-150W!
